If you’re anything like me, you hate spending money on something that you know you can do yourself. That’s why I’m always on the lookout for ways to save a few bucks – especially when it comes to my clothes.
So today, I’m going to show you how to hem jeans at home.
With just a few simple supplies and a little bit of patience, you’ll be able to fix your own jeans and save yourself some money in the process.
Follow these steps:
- Get The Correct Tools For Hemming Jeans
- Take Accurate Measurements Of Your Legs
- Mark Your Jeans Using Tailoring Chalk
- Use A Sewing Machine
- Use Hemming Strips
- The Finishing Touches
Get The Correct Tools For Hemming Jeans


When it comes to hemming your jeans at home, it’s essential that you obtain the basic tools needed to do a good job. You won’t have to spend hundreds of dollars here, but in order to get a perfectly tailored fit, you’ll need to get some high-quality supplies. Here are the basic items that you should have on hand:
- Tailoring Chalk – Tailoring chalk is used to mark the jeans before hemming them. It’s available in various colors, but I recommend using white so that it won’t stain the fabric.
- A Sewing Machine – A good quality sewing machine is essential for hemming jeans at home. Make sure to select one with the right type of needle and thread settings, so you can achieve the desired results.
- Hemming Strips – Hemming strips are a great way to get perfectly straight hems without the use of a sewing machine. They come in different sizes, so you can choose one that suits your needs.
- Pins & Needles – Pins are used to temporarily hold the fabric in place while you work, while needles are used to sew the hem.
Take Accurate Measurements Of Your Legs


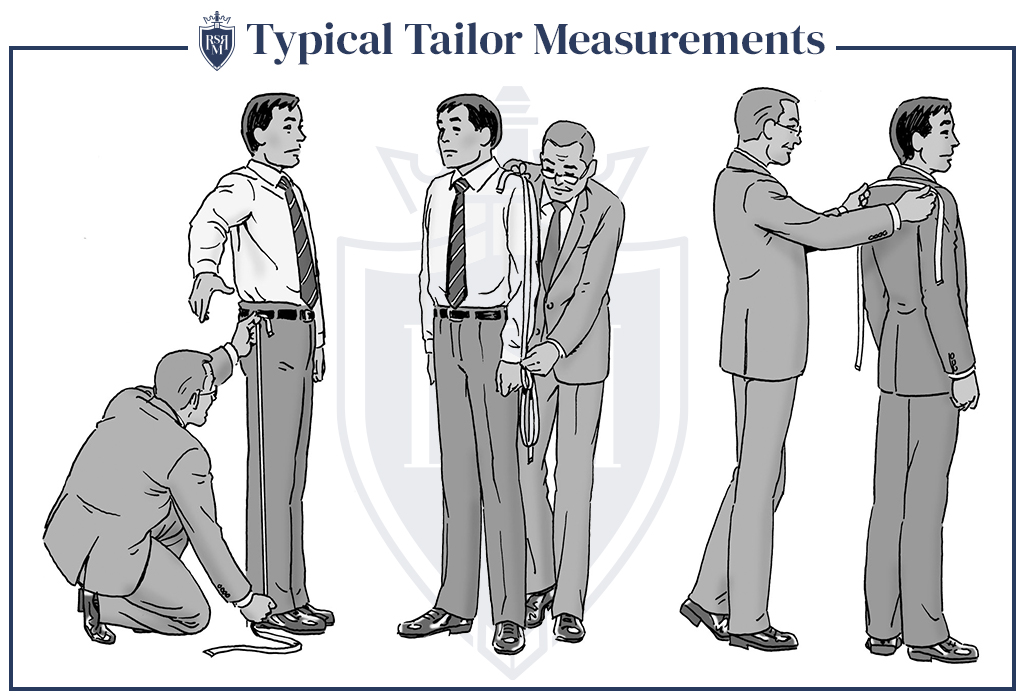
The first step in hemming your jeans is to take accurate measurements of your legs. Start by laying the jeans flat on a hard surface, and then measure from the bottom of your leg up to where you want the hem to be.
Doing this on your own can be tricky. When you lean over to measure from your ankle, you can affect the measurements you take and end up with inaccurate numbers. As such, if you have someone that can help you with the measuring, I’d advise that you have them do it for you.
When it comes to identifying the location your hem should be on your leg, be sure to factor in what shoes you typically wear with your jeans. If possible, wear these shoes when taking the measurements so that you can see where the jeans should fall.
For your reference, you’ll want the jeans to sit just on top of your shoes. There shouldn’t be a gap between the top of your shoes and the bottom of your jeans, but there also shouldn’t be any bundling of fabric atop your shoes.
Mark Your Jeans Using Tailoring Chalk


Once you’ve taken your measurements, it’s time to mark the jeans using tailoring chalk.
A word of warning – do not use any old chalk to do this. I’ve mentioned tailoring chalk for a very good reason, as regular chalk could easily stain the fabric of your jeans.
When marking the jeans, start at the bottom and draw a straight line up to where you measured. Make sure that it’s as close to a 90-degree angle as possible by using a ruler or measuring tape for guidance.
Once you’re happy with the line, draw another one just above it to create a small buffer zone. This is where you’ll be cutting the fabric, and it should sit at least half an inch above the line you just drew.
Remember, even the most experienced tailor makes mistakes, so double-checking the measurements you’ve drawn out is essential.
There’s an old phrase: ‘Measure twice, cut once’ which basically means that you should take care when measuring, as it’s much harder to fix a mistake once you’ve already cut the fabric.
Fold Your Jeans


Before you touch a sewing needle, you’ll need to fold up your jeans to the point where the new hem will be. This will help to minimize the amount of fabric that needs to be hemmed, as well as make it easier for you to sew when the time comes.
Start at the bottom and fold up your jeans until you reach the desired point. Aim for an even fold, making sure not to overlap any fabric from one side onto another. If necessary, pin the fabric in place while you work.
There are a few different ways you can do this:
- Fold outwards to create a contrast hem: This is the most common hemming technique, as it gives your jeans a clean and 50s-style aesthetic.
- Fold inwards: This method works better when you want to hide any imperfections or wear-and-tear that might be present on the fabric. However, the bottom of your jeans will lose the original hem and stitching, which I don’t think looks great.
- Double-fold to keep the original hem: This method is great if you want to keep the original hem of your jeans, as it essentially works by folding the excess fabric up and into itself. To achieve this fold, simply fold the excess fabric in on itself while leaving the original hem visible at the bottom of the garment.
Use A Sewing Machine


Now that you have your measurements marked on your jeans, it’s time to use a sewing machine. Set it up according to the instructions that come with it and make sure to use the right type of needle and thread settings.
Starting from the top, slowly stitch along the top of the fold you marked. Make sure to keep a steady pace so that you don’t produce uneven stitches, as this could affect the overall look of your jeans. Once you’ve finished stitching, cut off any excess thread and press the seam with an iron.
If you don’t have access to a sewing machine, you can also hand-stitch your jeans as well. This will take a bit longer, but it’s still doable if you have some patience and practice. Thankfully, I’ve got a separate guide to help you learn how to hand-stitch your own clothing!
Use Hemming Strips


Hemming strips are kind of the lazy man’s alternative to hand/machine sewing your jeans. They’re essentially strips that you can put underneath the fold of your hem that react to heat and stick the fabric together.
To use this style of hemming, simply cut the strip to size and place it on the underside of your jeans. Using an iron, apply heat to the hemming strip until it melts and sticks to the fabric.
Once this is done, simply fold up your jeans and press with an iron—you’re all finished! Hemming strips are a great option if you want to make quick adjustments to your garments in an emergency situation.
The Finishing Touches
Congratulations! You made it this far and, if you’ve been following along with this guide, you should have a well-hemmed pair of jeans in front of you right now.
That means you’re finished, right? Not quite yet. Check for any missed stitches and make sure everything looks neat before you call it quits—you don’t want your hard work to be undone by a loose thread or two!
If you find a loose thread or missed stitch, don’t panic! You can easily take care of this with a needle and thread.
Once you feel like everything is in order, give your jeans one final press with an iron and you’re done! Congratulations on successfully hemming your own jeans – I bet they look great!